This guide will show you step-by-step how to install Google Analytics on your WordPress website. Google Analytics will enable you to track and monitor visitor behavior.
- Visit the Google Analytics website, and click the “Get started today” button.
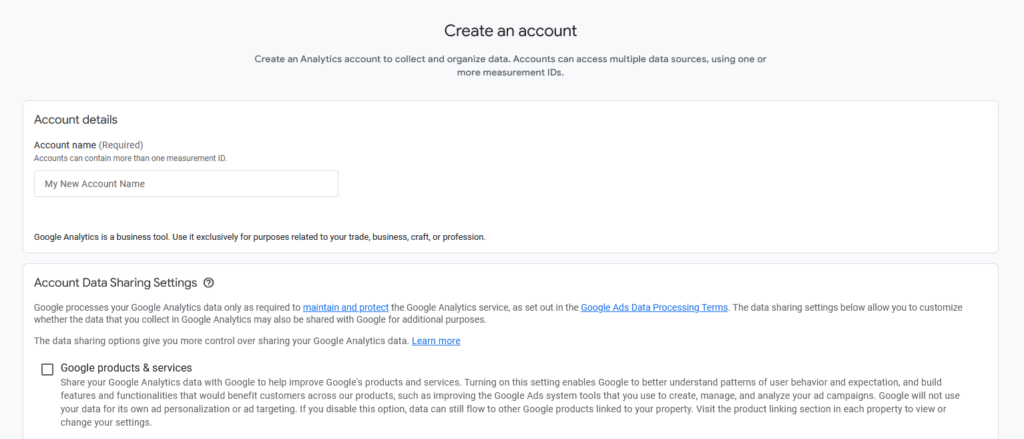
- On the Create an account page, give your account a name and customize the data-sharing options, then click the “next” button.
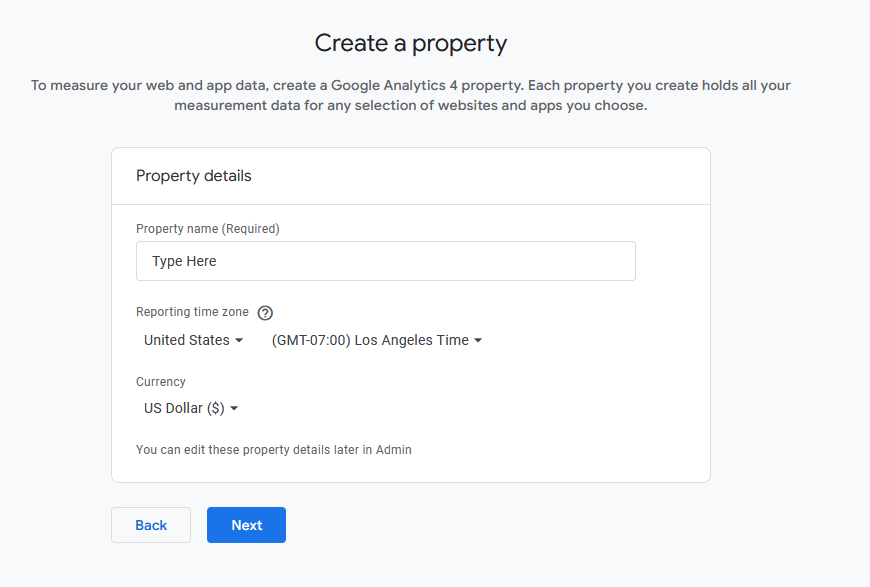
- On the Property details screen, name your property, select its reporting time zone, and select the currency of the location you normally operate in, then click the “next” button.
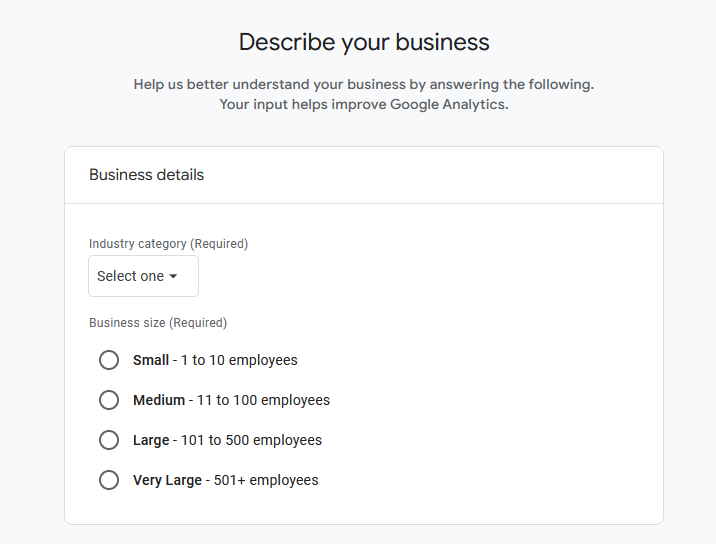
- On the Business details screen, select your industry category and business size, then click the “next” button.
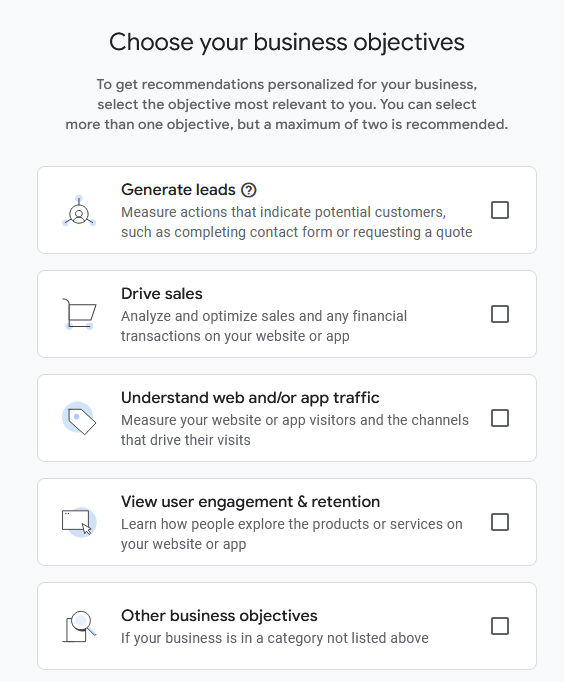
- On the Business objectives screen, choose your business objectives, then click the Create button.
- On the Data collection screen, select Web as your platform.
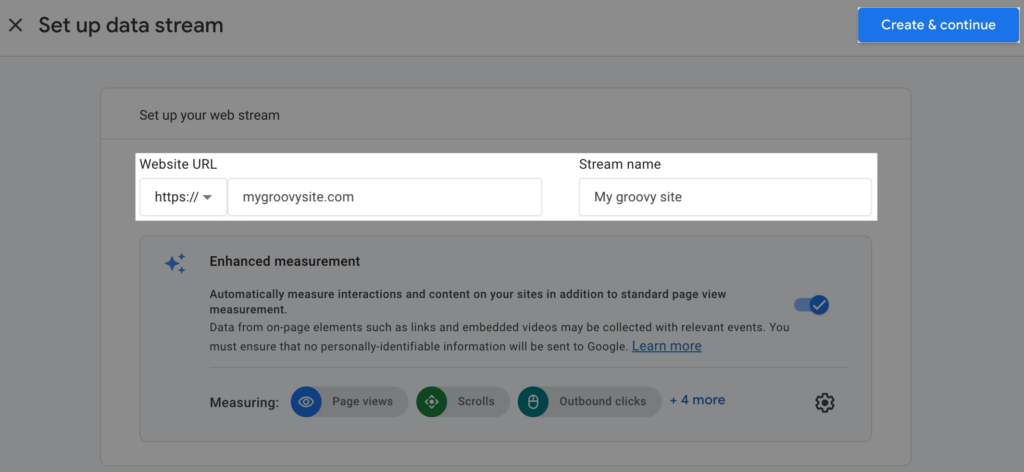
- On the Set up data stream screen, under the Website URL, type your website domain and enter your site name in “Stream Name”, then click the “Create & Continue“.
- Look for the “Install with a website builder or CMS” option, then click the “next” button.
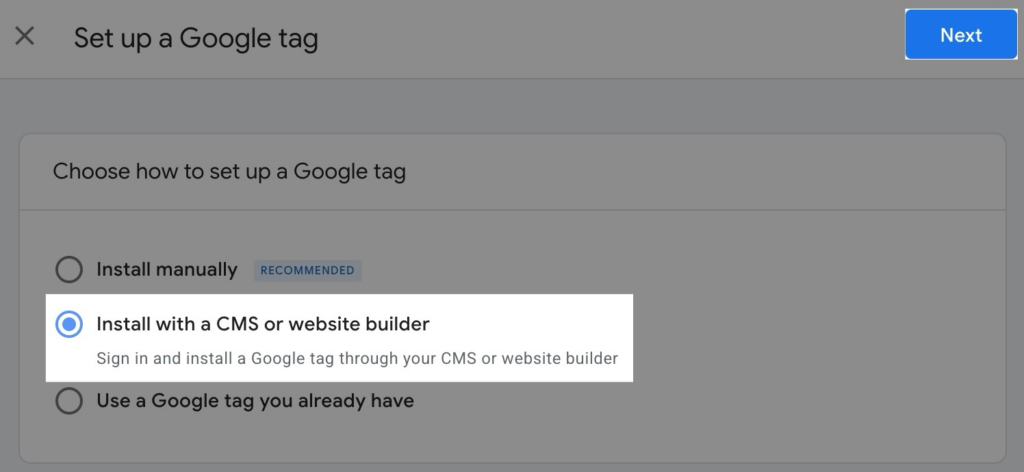
- Click the “Select your platform” button and choose WordPress.
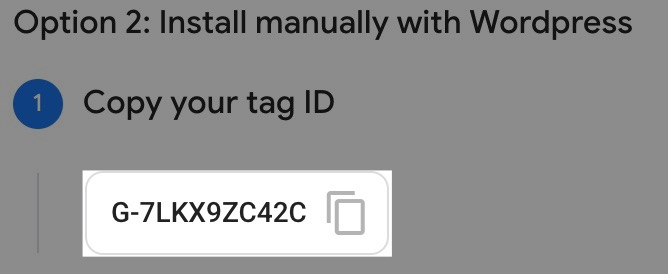
- Copy your tag ID.
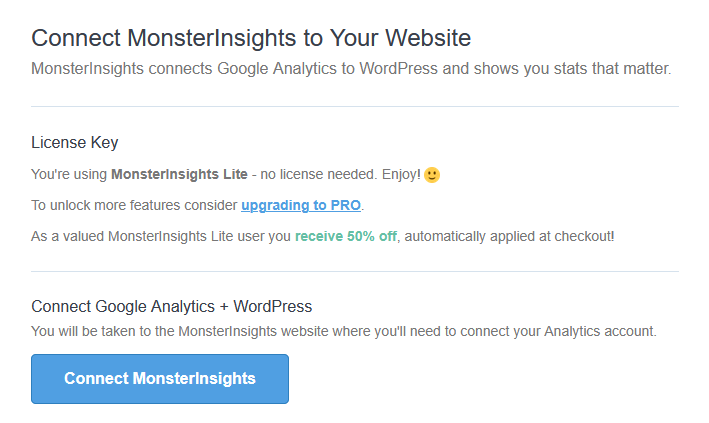
- Visit your site’s WordPress dashboard, and navigate to Plugins. Activate “Google Analytics for WordPress by MonsterInsights“.

- Connect and authenticate your Google Analytics account to MonsterInsights.
- Allow MonsterInsights to have access to your website’s data, then select the “All Website Data” profile.
- Complete Authentication.
Your site will now connect to Google Analytics and transfer data to Google. After 24 hours, you will receive visit reports and detailed displays of your site’s information.