These steps are based on using the CASE Faculty Theme. Users of other Themes may wish to view the guides under MyWeb Documentation or the general CASE WordPress user guide.
Now that you’ve chosen a Theme, you can set up your website’s header and footer areas.
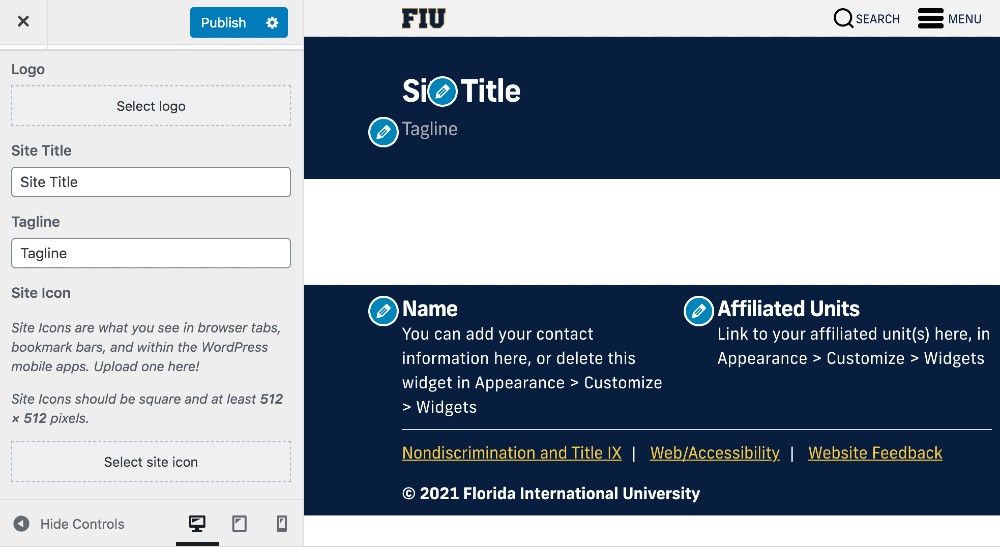
Go to Appearance > Customize. Here you can change many parts of your website, with live previews. Click on the pencil icons to make changes.
Header
Update the Site Title to your name, your lab’s name, or another name, as desired.
You may add a Tagline – for example, using the Site Title for your lab’s name and the Tagline for your name – or leave this field empty.
Add the FIU Site Icon which will appear in your browser tab. (Default is the WordPress “W.”) You may save and upload this icon: https://case.fiu.edu/_assets/images/fiu-favicon.png
Footer
Customize the footer areas by clicking the pencil icons. Your contact information and unit affiliations (departments, centers, colleges, etc.) are ideal information for the footer. Alternatively, you may remove the areas.
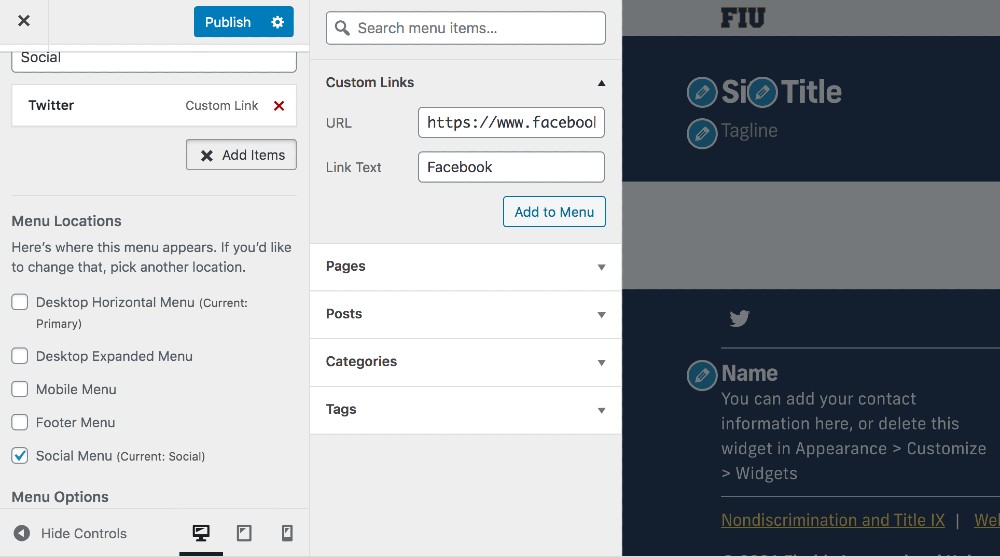
To add your social media links, go to the Menus tab in the Customize page and choose “Create New Menu,” then the Social Menu location.
Choose “Add Items” > Custom Links. Enter the address of your account and write the platform’s name (Twitter, Facebook, etc.) in the Link Text field. WordPress will create an icon automatically for most platforms.